
Data Tags
This article explains how the data managed when a card is view and the automation runs.
Trigger
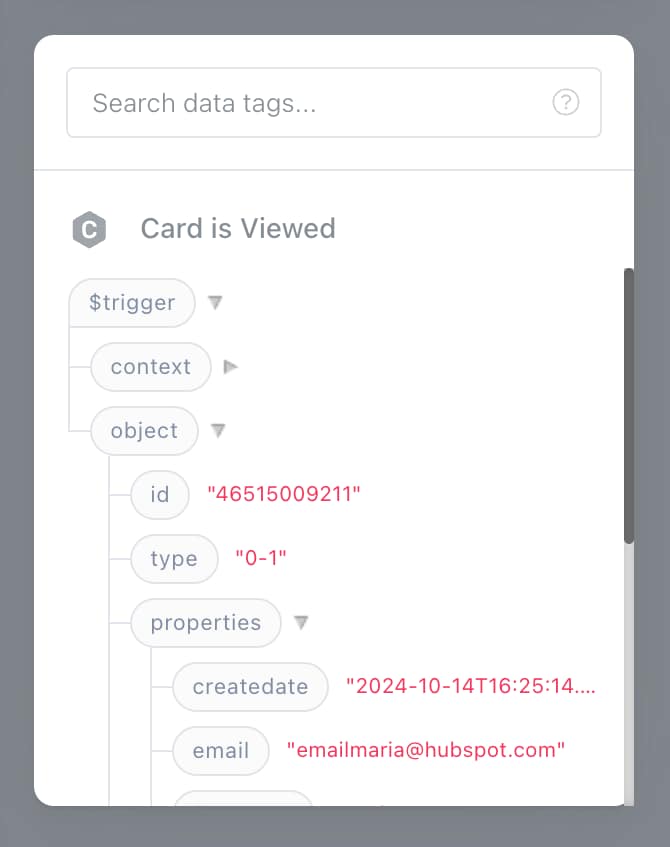
When the automation starts running, a $trigger is injected into it which contains two sets of information:
context: who's viewing the cardobject: which includes such information asid,properties,associations.
You can drag and drop these Data Tags inside Interface or action options.
When you drag and drop them, they'll end up looking like {{$trigger.object.properties.email}}.
If you want to refer to the same data tag inside Run Code (JavaScript), you can do it via the input.trigger.object.properties.email.
Actions
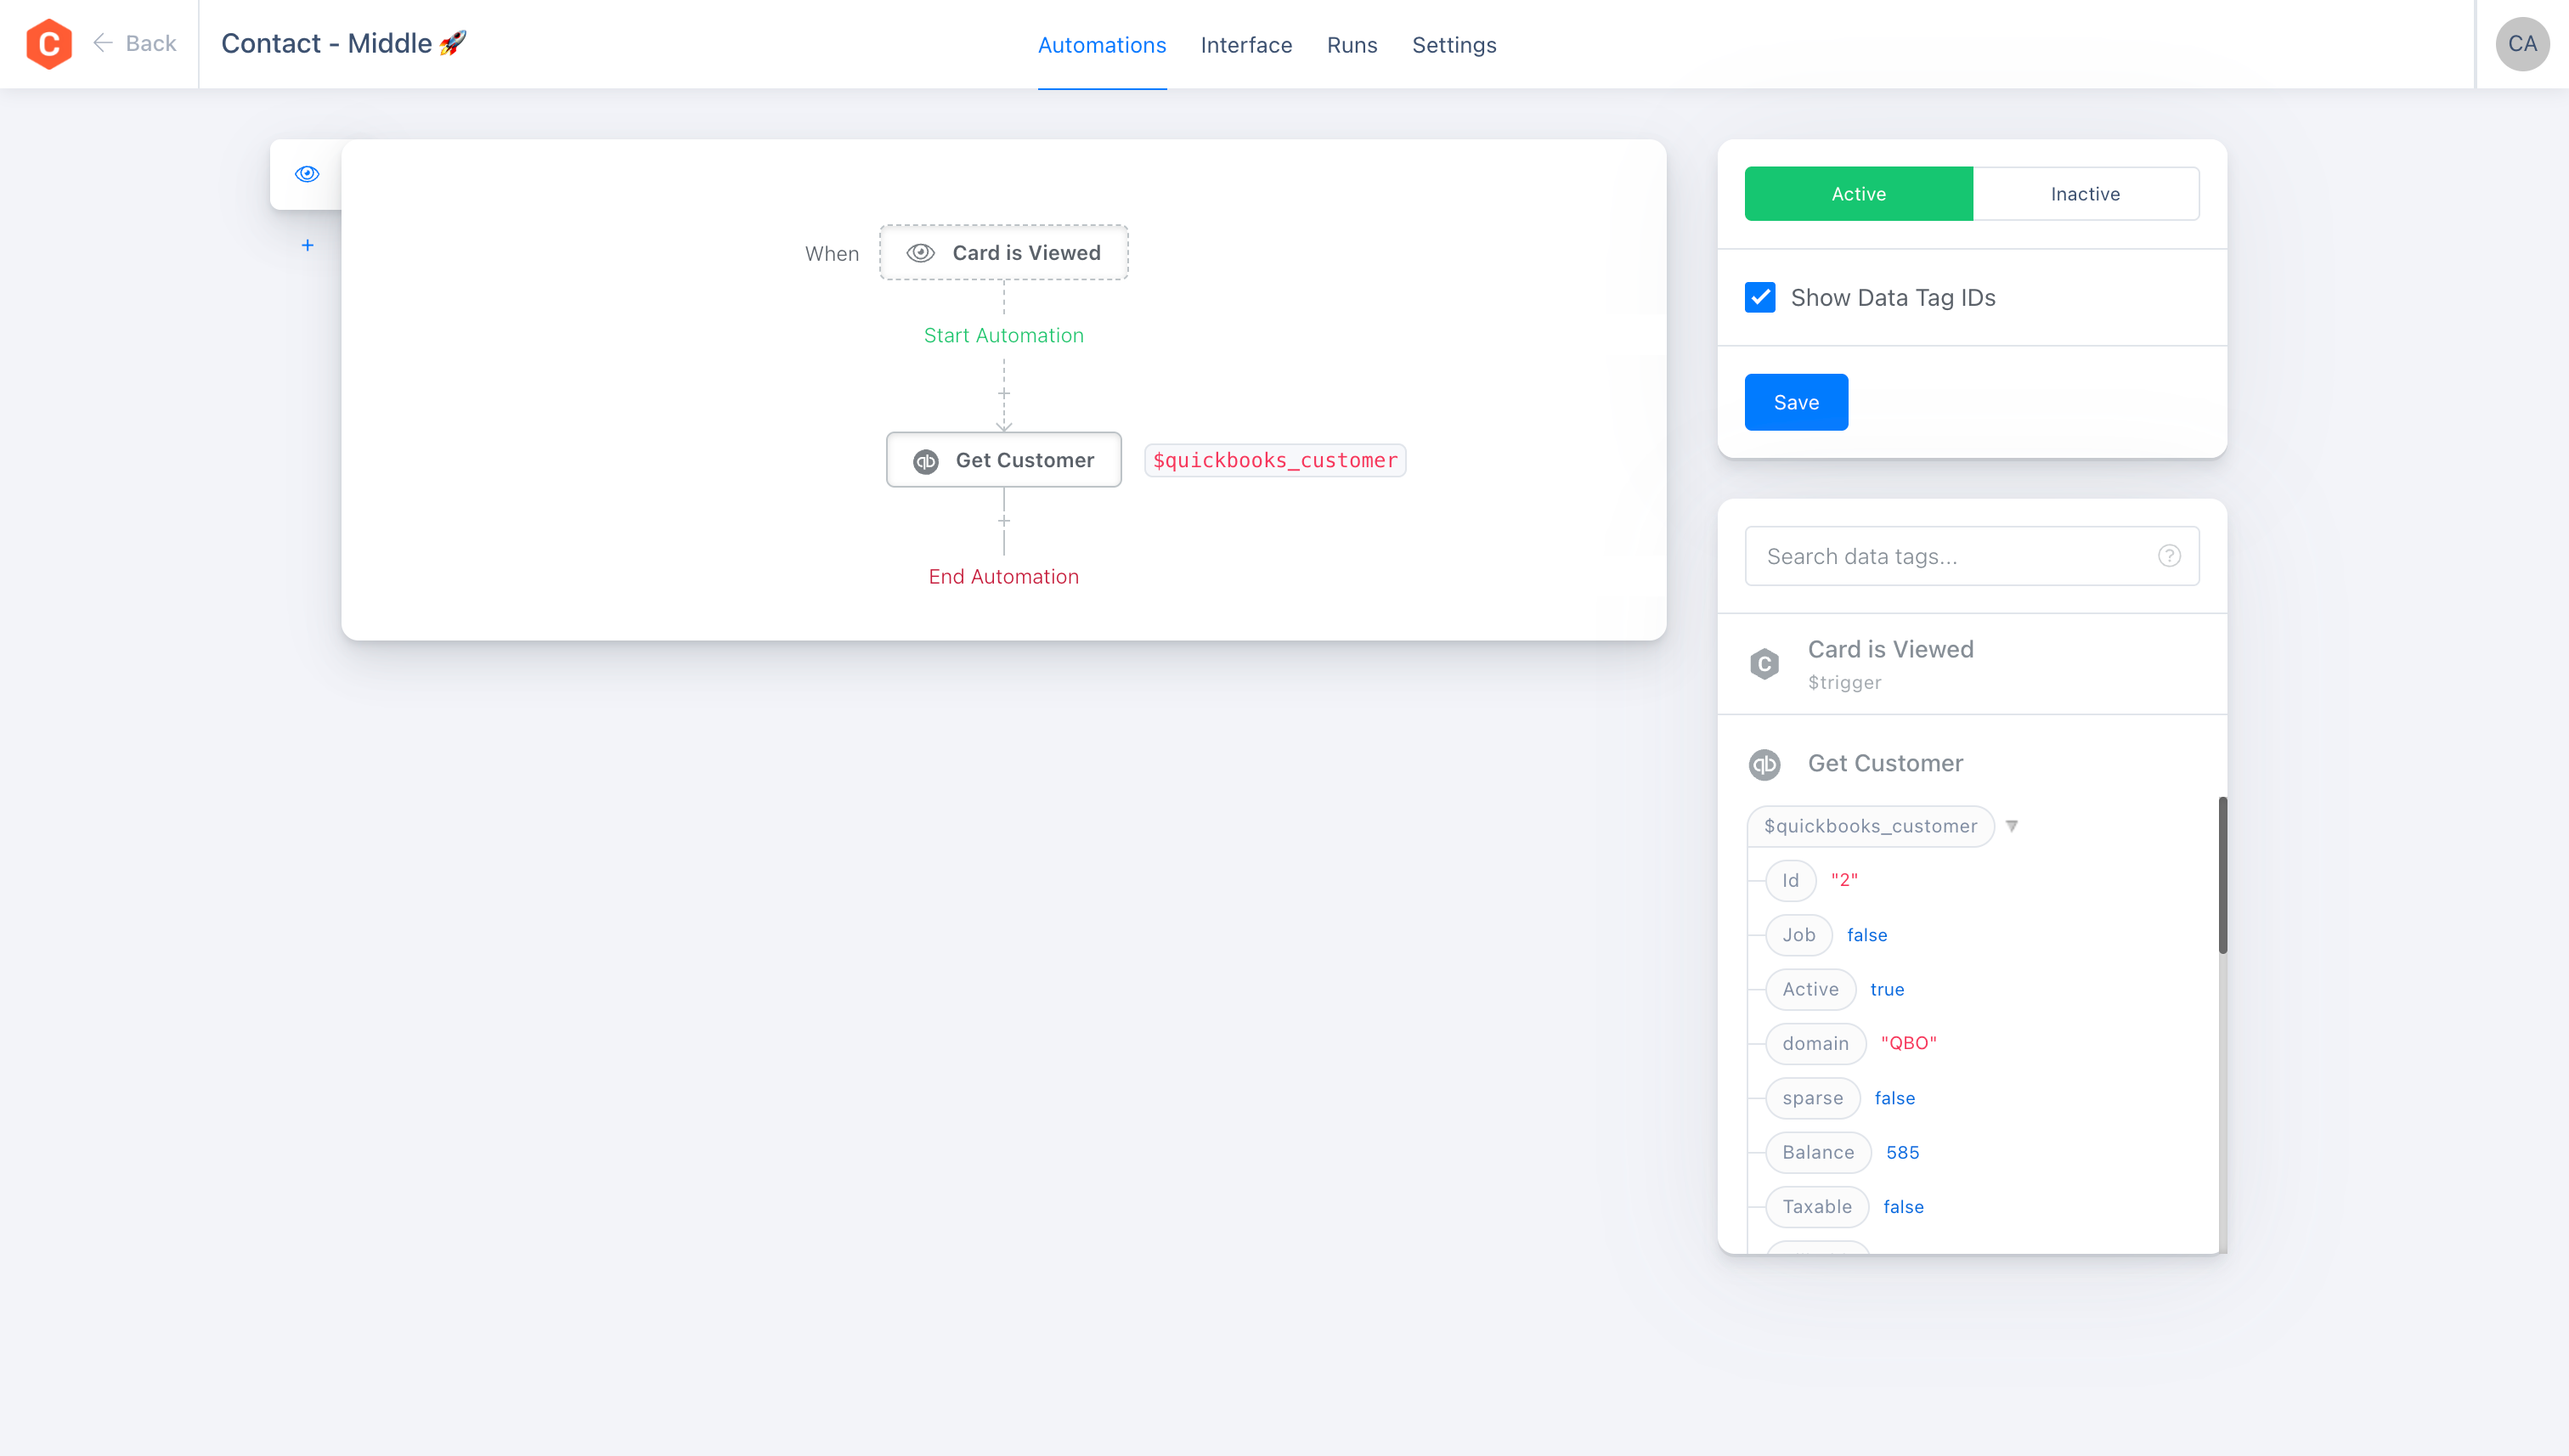
When actions run, they will add their output to Data Tags, which will then be available for next actions or the Interface.
Given the example below, Get Customer action will write it's data to $quickbooks_customer data tag.
Which you can then refer to via {{$quickbooks_customer.Id}} or input.quickbooks_customer.Id inside Run Code (JavaScript).
JSON
If you understand JSON, data tags are just a reference to keys inside JSON.
When card is viewed and automation runs, a JSON object with trigger key is injected into it.
{
  "trigger": {
    "context": { ... },
    "object": {
      "id": "1234567890",
      "type": "0-1", // means HubSpot Contact
      "properties": { ... },
      "associations": {
        "company": [{
          "id": "1234567890",
          "properties": { ... },
        }]
      }
    }
  }
}
You can reference this data inside action options and Interface using syntax such as {{$trigger.object.properties.email}} or inside Run Code (JavaScript) via input.trigger.object.properties.email.
When actions finish running, they will update this object and insert a top level key, e.g. quickbooks_customer, where you'll end up with new JSON such as:
{
  "trigger": { ... },
  "quickbooks_customer": { ... }
}